
Shipping is one of the most important parts of any business and doing it right will help you business as well. In the tutorial, we have explained in detail how we expect every vendor to set up their shipping.
Before you proceed to setting up your shipping, PLEASE MAKE SURE YOU HAVE ENTERED YOU STORE LOCATION IN THE STOREFRONT SECTION. This is very important because rates for shipping are going to be calculated starting from that point.
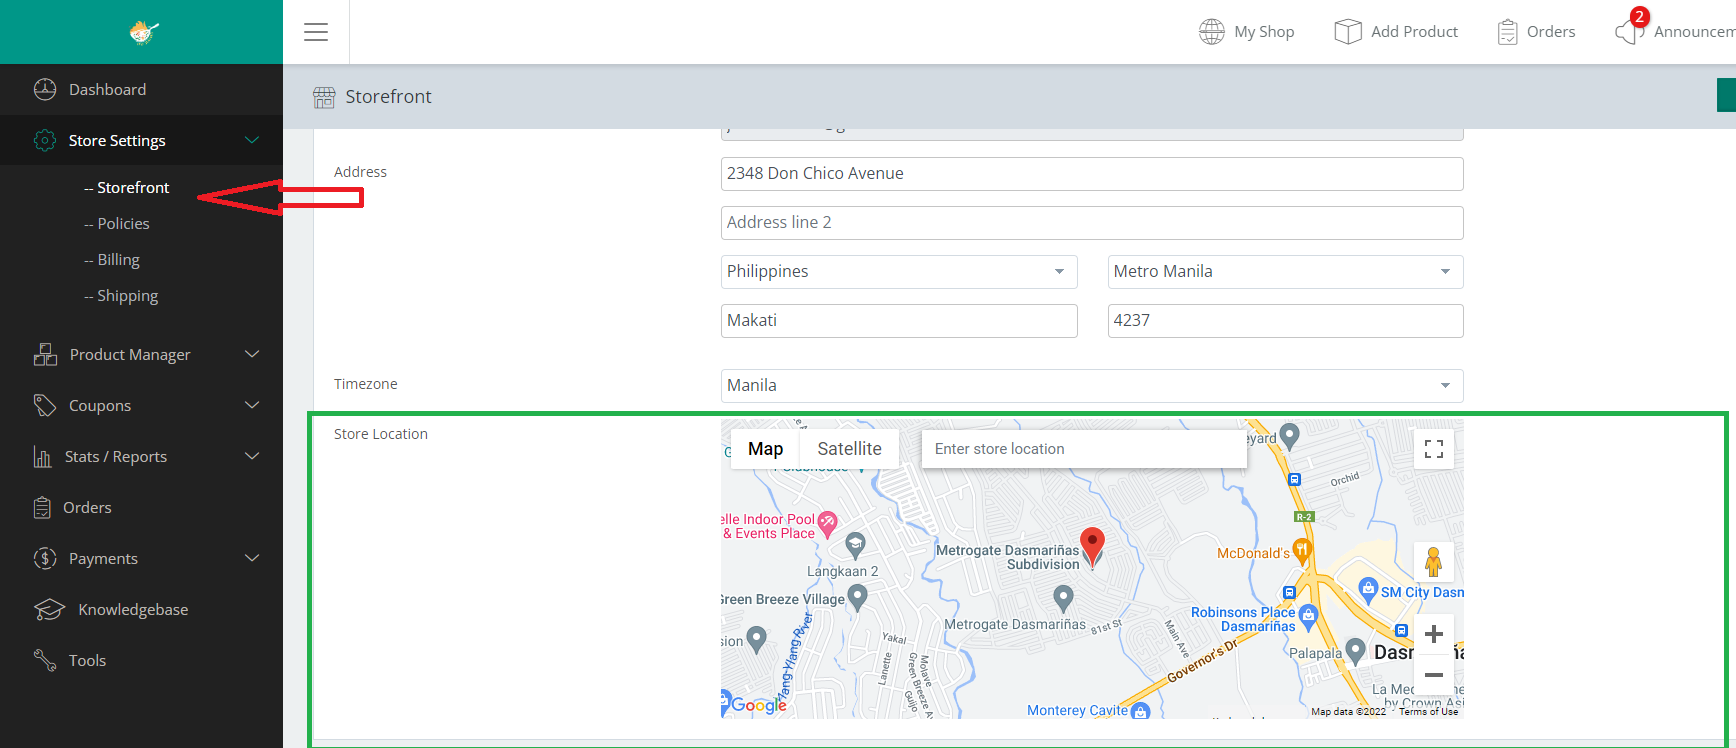
Make sure you enter your store location there and select it on the map.
Once you have done that, you may proceed to the Shipping section.
When the tab loads, you’ll see something like the image above and also this:
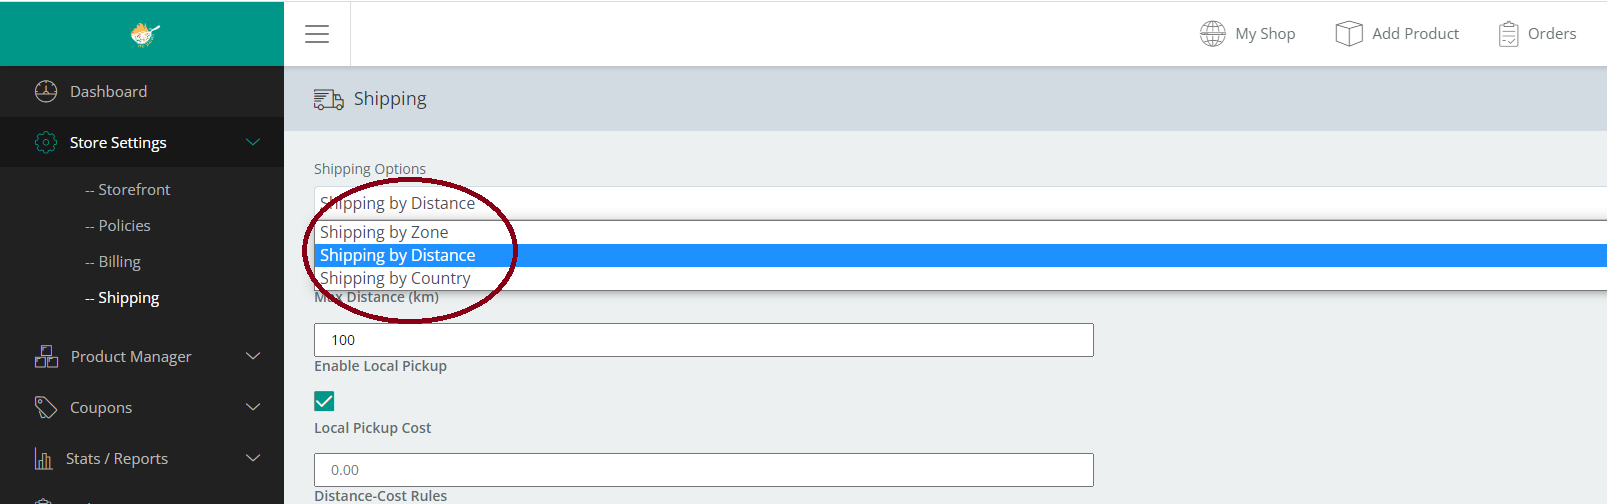
There are three types of shipping there, By zone, By Distance and By Country. By Distance is what we are going to be using hence you select it.
Lalamove and other delivery service companies calculate delivery fee by giving a base fee and then fee per KM. For example, the base fee for lalamove is P49 and then P5 per KM for up to 5 KM. This is the same format we are using.
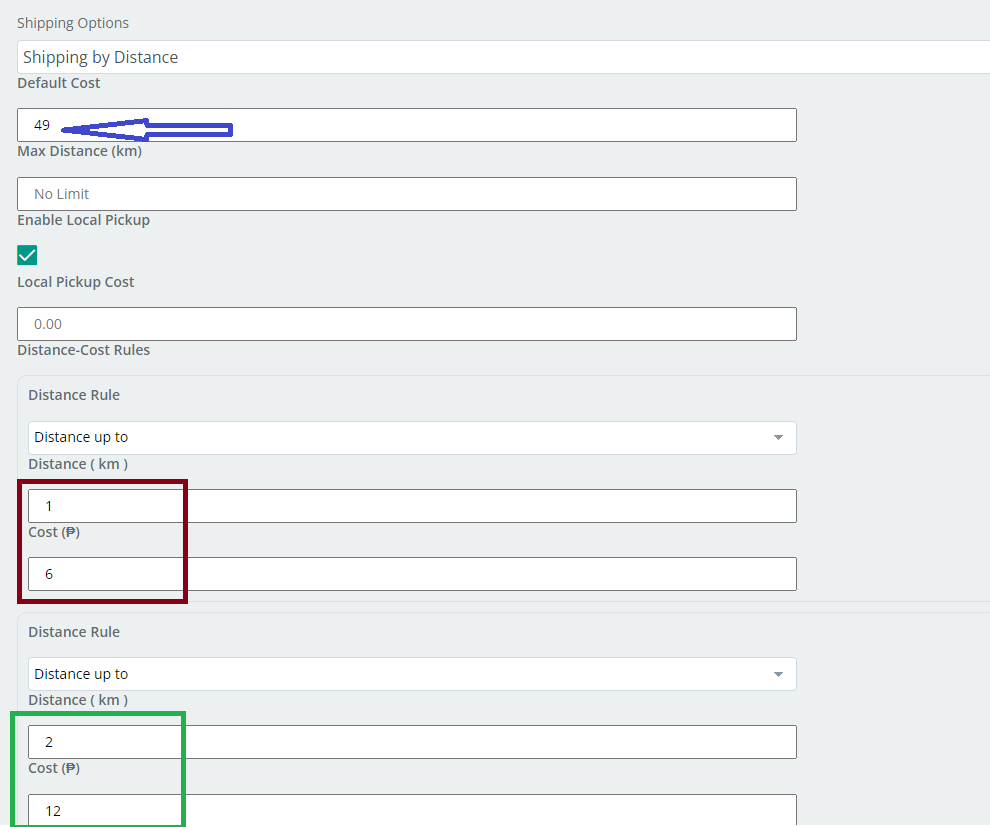
When you select Shipping by Distance, you are going to set up just this way. Enter a Default Cost of P70 (IT MUST BE P70 AND NOTHING MORE. YOUR STORE WILL BE SUSPENDED IF WE SEE AN AMOUNT MORE THAN P70).
- Default Fee. P70
- You may enter Maximum KM if you want to limit how far you ship your products. You may just enter 100 KM as the default longest distance or just leave empty for no limit.
- Enable Store Pickup by checking the box and leave the fee field empty as there’s no fee for Pickup. When customers choose pickup, they’ll be the ones to book delivery themselves.
- Next is the distance cost rule.

- In the dropdown, select Distance up to and then set the value to 1. That is 0-1KM. The cost is going to be 10 pesos per Kilometer. Do this for 2, 3, 4 and 5 and for each distance, multiply 10 by the KM and that will be the cost. See image below.
- When you reach 5 KM. We need to change the fee per KM to P10. Now Distance up to 6 KM will be 10 multiply by 6 which is P60 pesos. Do this for 7,8,9,10……until how far you want to ship.
D0 this for as far as you want to ship and save your shipping. All customers ordering from your store will be charged this rate.
Enable to follow the instructions we have given. rate per kilometer should be 10 pesos and nothing more. Any store caught wanting will be suspended without warning.
Before adding your first product, let’s get familiar with how product categories, tags, and attributes work.
Product Categories
Product categories and tags work in much the same way as normal categories and tags you have when writing posts. They can be created, edited, and selected at any time. This can be done when you first create a product or come back and edit it or the category/tag specifically.
Attributes
These can be added per product, or you can set up global attributes for the entire store to use (e.g., in layered navigation).
Product Types
With attributes and categories set up and stock management configured, we can begin adding products. When adding a product, the first thing to decide is what type of product it is.
- Simple – covers the vast majority of any products you may sell. Simple products are shipped and have no options. For example, a book.
- Grouped – a collection of related products that can be purchased individually and only consist of simple products. For example, a set of six drinking glasses.
- Virtual – one that doesn’t require shipping. For example, a service. Enabling this, disables all shipping related fields such as shipping dimensions. A virtual product will also not trigger the shipping calculator in cart and checkout.
- Downloadable – activates additional fields where you can provide a downloadable file. After a successful purchase, customers are given a downloadable file as a link in the order notification email. This is suitable, for example, for a digital album, PDF magazine, or photo.
- External or Affiliate – one that you list and describe on your website but is sold elsewhere.
- Variable – a product with variations, each of which may have a different SKU, price, stock option, etc. For example, a t-shirt available in different colors and/or sizes.
SKU
SKU, or Stock Keeping Unit number, is a unique number assigned to a product for, amongst other things, the purpose of keeping track of inventory.
The SKU field can accept up to 255 characters, which can include alphanumeric values and some special characters. The input is checked using the WordPress function santize_text_field, which means HTML, invalid UTF characters, and octets will be removed when saved (an octet is defined by % followed by 2 characters with a value in the range of a-f or 0-9).
Adding a simple product
Adding a Simple product is similar to writing a post in WordPress.
- Go to WooCommerce > Products > Add Product. You then have a familiar interface and should immediately feel at home.
- Enter a product Title and Description.
- Go to the Product Data panel, and select downloadable (digital) or virtual (service) if applicable.
Product data
The Product Data meta box is where the majority of important data is added for your products.
General section
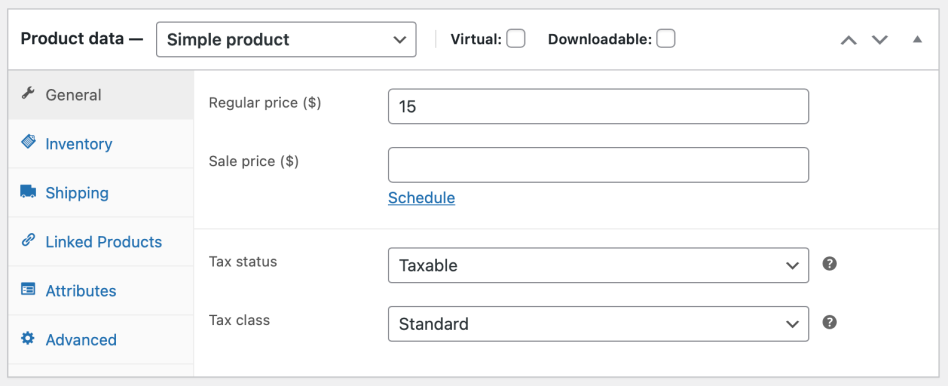
- Price
- Regular Price – Item’s normal/regular price
- Sale Price – Item’s discounted price that can then be scheduled for certain date ranges. The sale expires at 11:59pm of the specified end date
- Tax
- Tax status – Taxable / Shipping only / None
- Tax class – Choose which tax class should be applied
Inventory section
The inventory section allows you to manage stock for the product individually and define whether to allow back orders and more. It enables you to sell products and allow customers to add them to the cart to buy.
Enable Stock Management must be selected in Products Inventory Settings; otherwise, only the ‘Stock status’ option is visible in the Product Data Inventory box.
Options when stock management at product level is disabled. You are responsible for updating the Stock Status.

Options when stock management at product level is enabled.
- Enter the Stock Quantity, and WooCommerce auto-manages inventory and auto-updates Stock Status as Stock, Out of Stock or On Backorder.
- Select whether to Allow Backorders.
- Low stock threshold – Enter a number upon which you are notified.
- Tick the Sold Individually box to limit the product to one per order.
Linked Products section
Using up-sells and cross-sells, you can cross promote your products. They can be added by searching for a particular product and selecting the product from the dropdown list:
